3 Common Problems with Stormwater Infiltration and How to Correct Them
When you boil it down, stormwater management is essentially the process of trying to mimic pre-development hydrology with post-development site planning and engineering. Early practices focused on managing the rate of precipitation leaving a site, but now we take a more integrated approach that spans rate, volume, and water quality. Because of this paradigm shift, it’s not surprising that a stormwater management approach that focuses on infiltrating water back into the soil has gained popularity. However, with all good things there can be the potential for problems, and stormwater infiltration is not immune to those problems. The good news is that 99.9% of problems related to stormwater infiltration are usually avoidable or at least correctable. Let’s look at 3 common problems that arise when infiltrating stormwater and some ways to correct them.
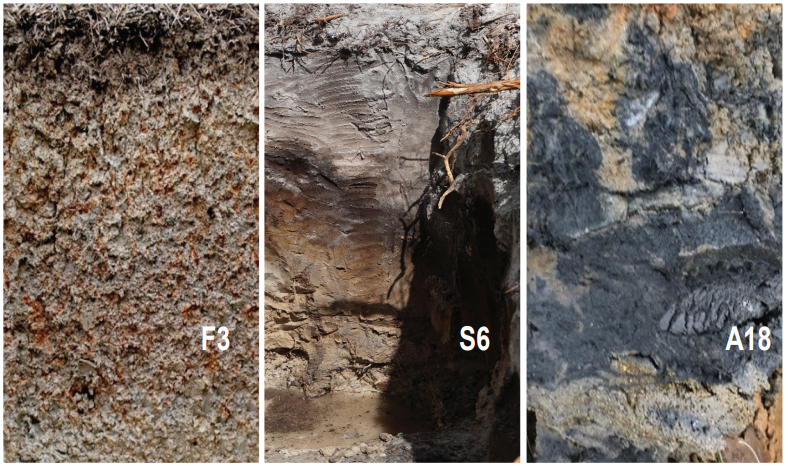
1. The Soils
You know, infiltrating stormwater would be easy if the darn soils would just cooperate! Whose idea was it to make soils so variable? On top of that, it would be really nice if soils in the low spots of a landscape weren’t so wet to begin with. How come all the best places to put stormwater best management practices (BMPs) always require water to flow uphill?
It’s tempting when designing a site plan to immediately pencil in the stormwater BMPs in the low spots and to rely on the NRCS soil map and the hydrologic soil groups to assume that it will all work out when things get constructed. Unfortunately, although soil maps are a nice place to start, and it would make life so simple to send water to those low areas, believing in either or both of those assumptions is likely leading you to some heartache. That doesn’t mean that every low point in the landscape is bad for BMPs and that every soil map will lead you astray. The point is that soils can change dramatically over a small spatial extent and knowing what is there before you commit to a site layout will save you headaches further into the project.
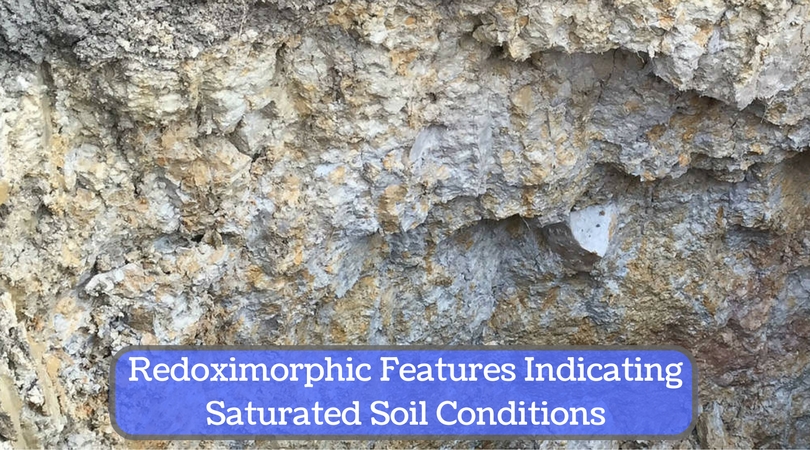
You’ll want to get a look at the soil either through a soil test pit or augering to determine any limitations to stormwater renovation. Assuming the soil looks suitable, you’ll want to conduct an infiltration test. Most test procedures are based on measuring the saturated hydraulic conductivity using an apparatus such as the double ring infiltrometer pictured below. The point is to measure the steady-state rate of water moving into the soil. Once you know the soil is suitable for renovating stormwater and you have a measured rate at which it can assimilate water, you can properly site and size your infiltration BMP.

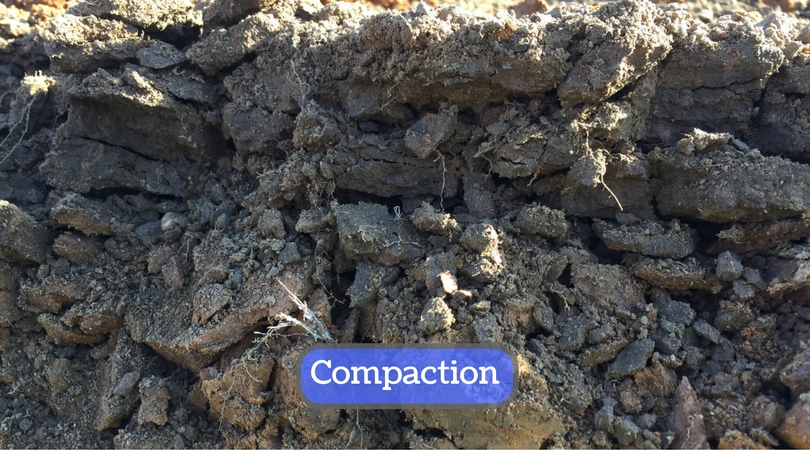
2. Compaction
So let’s say you have the most perfect soil in the world in the exact location you want to place a BMP. Life is good, birds are chirping, and everything you touch is turning to gold… until you destroy the soil during construction. Now your perfect soil is the functional equivalent of concrete, birds have ceased chirping, and you’ve killed the golden goose of permeable soil. It took mother nature a long time to get that soil into shape, and now you’ve come in and set it back 1,000 years. The most frustrating thing about compaction is that it can be minimized or avoided with just some simple construction and project planning techniques.
First, limit vehicle and foot traffic in areas that will be used for infiltration. This doesn’t necessarily mean just areas that will become structural BMPs. Open lawn areas and other open spaces will eventually need to function once the project is complete. Just because you can get grass to grow on it after the project is over doesn’t mean the soil isn’t severely limited in its capacity to infiltrate water. I’ve been in subdivisions where you get almost as much runoff from the “permeable” lawns as you do off the “impermeable” roofs and driveways.
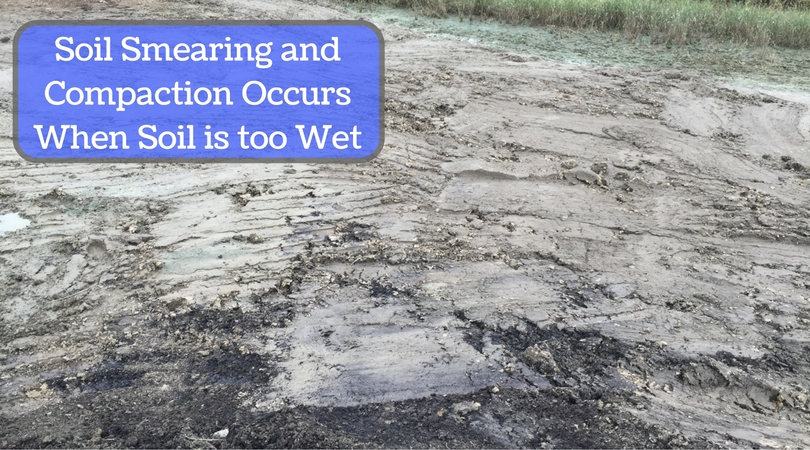
Second, excavate out most of the soil you need to remove, but leave 6 to 12 inches in place. Then, as you are ready to finalize the BMP, remove the remaining soil as you back the equipment out of the area. This helps avoid inflicting compaction while also alleviating any you might have caused. With the final grading, use the teeth of the excavator bucket to “rough up” the infiltration surface. Don’t smear the soil pores shut by dragging the bucket across the soil to try and make it smooth. The water is going to find its way through the soil, and the “ridges” and “valleys” you create with the bucket teeth will not impede the water movement, in fact it will likely improve it. By trying to make everything perfectly smooth so the water spreads out easier only results in closing off the soil pore network and has the opposite of the intended effect.
3. Siltation
During any land development project, the use of erosion and sediment controls are common. There are a plethora of tools and techniques to make sure soil erosion leaving the site is minimized. However, how much effort is made to control soil erosion within a site? How many times have you seen a proposed infiltration BMP used as a sediment trap during construction, but when it’s converted to an infiltration basin all the erosion controls are taken away? What you’re left with is a vulnerable BMP just waiting for a precipitation event to funnel all that upslope soil into the basin before vegetation is firmly established.
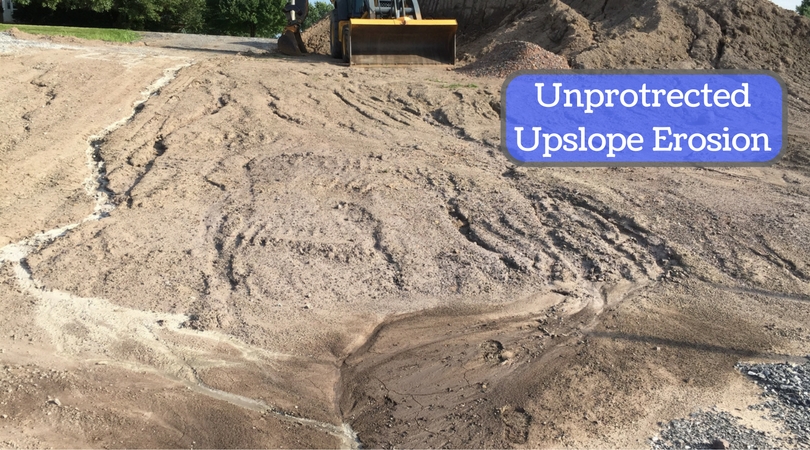
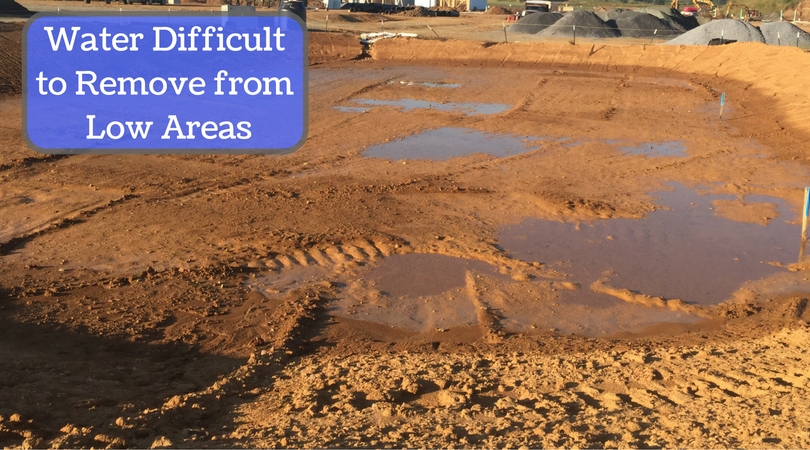
If the silt and clay get into the basin before significant vegetation establishment occurs, the infiltration surface “silts over” and the infiltration rate plummets. Now you’ve effectively turned your infiltration basin into a stagnant retention pond.

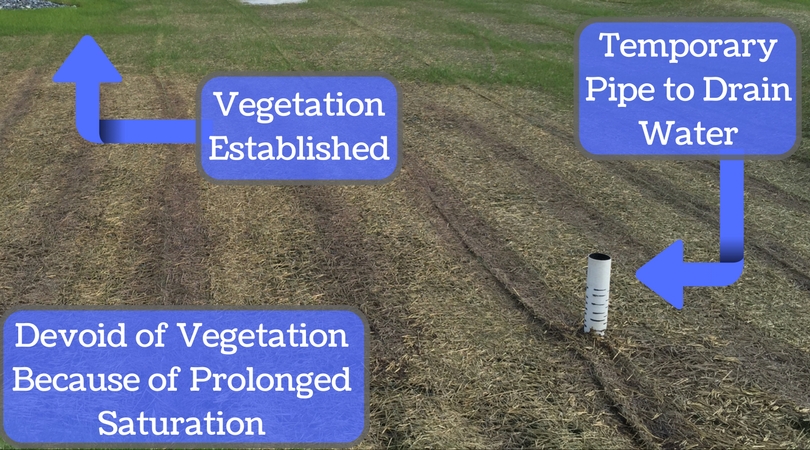
Stopping this from happening is easy, just make sure proper erosion and sediment control measures are in place around the BMP. Things like Silt Soxx or silt fence work just fine to accomplish this. If it’s already happened, fixing it can be a bit more tricky. Essentially you need to remove that silt crust layer, but the problem is you now have a pond. Most likely you’ll need to create a sump pit so you can use a portable pump to empty the basin. However, it’s almost impossible to completely empty the basin, so there will still be small puddles and the overall basin surface will be very wet.
Here’s where you need to be careful, because you don’t want to create a compaction problem while you’re trying to fix a siltation problem. If you can, and weather cooperates, give it a few days to dry out. If you can’t, you’re going to need to proceed carefully. In either scenario, if possible, keep all equipment out of the basin. Assuming the BMP is a modest size, you should be able to reach in with a backhoe or excavator arm and scrape off the surface silt crust layer. If you were somewhat successful drying the soil out prior to doing this, the process of scraping the silt crust off should also result in you scarifying the infiltration surface without causing soil smearing or further compaction. Once you’ve removed all the silt crust, and assuming the soil is at a workable moisture content, you can begin the process of reseeding.
As discussed, fixing problems is always harder and more costly than avoiding them. Take the time upfront during planning to understand the soil conditions of your site. Think out construction sequences and equipment work flow and spend a little more time prepping the infiltration BMP to avoid compaction. Finally, protect the infiltration BMP like the valuable piece of infrastructure it is. Although they are often simple in regards to design and construction, infiltration BMPs need some TLC during and post construction to assure their designed function is realized.


Thanks for explaining how to prevent soil erosion problems. I agree with you, it is better to prevent problems than to try and fix them. Unfortunately, stormwater drainage isn’t normally something I think about until it is a problem. So, the solution for me is to make sure I work with someone with more forethought than me.